Importing products into your Shopify store is necessary for expanding your inventory and keeping your online shop updated, two elements that can represent a crucial competitive advantage for any business.
This guide will walk you through the process of importing products into Shopify using a CVS (Comma-Separated Values) file, ensuring that your store operates smoothly and efficiently. Whether you’re migrating from another platform or adding a new range of products, this step-by-step tutorial will simplify the process.
Why Import Products into Shopify via a CSV File?
Before diving into the how, let’s explore the why – why is importing products into Shopify a total game-changer for your business?
- Enhances Efficiency: Instead of manually entering each product individually, bulk uploads via a CSV file can be done. This is a good alternative to save considerable time and effort. This method is particularly beneficial when dealing with a large inventory.
- Minimizes Errors: Using a CSV file reduces the likelihood of errors. Manual data entry can often lead to mistakes, such as incorrect pricing or descriptions, which can be costly and time-consuming to correct. By importing products, you ensure that all information is accurate and consistent.
- Maintains Uniformity: Importing products helps maintain uniformity across your store. When product data is uploaded in bulk, it ensures that details such as descriptions, tags, and pricing are consistent. This way, you will provide a better shopping experience for your customers.
Undoubtedly, importing products into Shopify via CVS is ideal for streamlining your store management and maintaining an organized inventory, which translates into a more efficient store. Now we´ve cleared this up, let’s discover how to do it.
Importing Products into Shopify
Importing products into Shopify in theory is simple: you just head to the products section, click import, choose the file you want to upload, and your product should import.
However, in practice, this can be a bit more complicated, especially if your data isn’t in the format required by Shopify. But don’t get discouraged; I’ll show you how to do it in just 5 steps.
Step 1: Prepare Your CSV File
Source: https://help.shopify.com/en/manual/products/import-export/using-csv#download-a-sample-csv-file
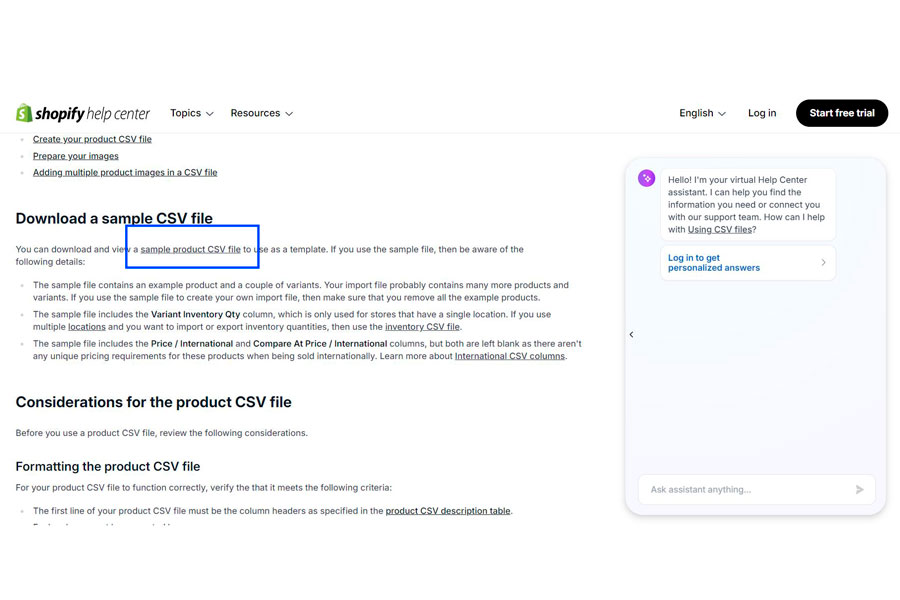
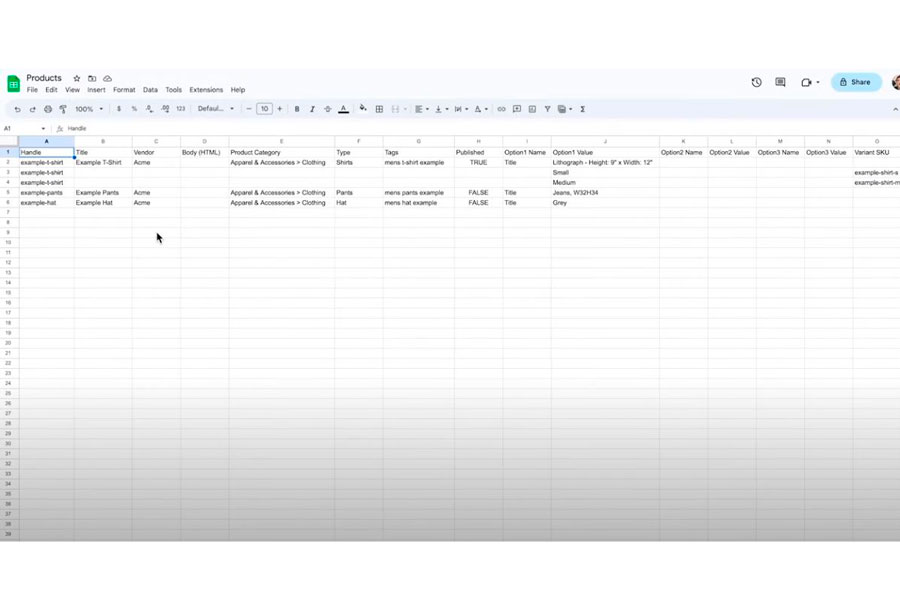
To import products into Shopify via a CSV file, the first step is downloading a sample CSV file. You can find it in the Shopify Help Center.
This sample file provides a structured format, including necessary columns such as ´Handle´, ´Title´, ´Body´, ´Vendor´, ´Variant Price´, among others. Fill in the product details for each column and ensure your CSV file adheres to this structure. This way you´ll avoid any errors during the import process.
I give you some advices:
- If your product has no variants, enter all the fields for the product in the first row along with the URL for the first image. In the following rows, only enter the handle and the URL for each image if you have more than one.
- If your product has variants, enter all the fields for the product in the first row and the URL for the first image. In the next rows, enter the handle, but skip the title, Body HTML, vendor and tag columns, then fill out the rest of the variant´s details for each image URL.
- If your image files are only on your computer, upload them to your Shopify store. From the content section of your admin, click files. Then, click upload files to create an image URL for each image
Make sure all entries are accurate and complete. After populating your CSV file, save it in UTF-8 format to avoid any encoding issues that might disrupt the import process.
Step 2: Access Shopify Admin
Once your CSV file is ready, log in to your Shopify admin panel. If you don’t already have an account, you’ll need to sign up for one.
Step 3: Navigate to Product Import

Source: How to Add Products using a CSV file || Shopify Help Center from: https://www.youtube.com/watch?v=y_x0L_Oj4Zk
In your Shopify admin, navigate to the ‘Products’ section and click on ‘Import’ at the top right corner of the page. You’ll then be prompted to upload your prepared CSV file by clicking ‘Add file’ and selecting your CSV file.
Step 4: Review and Import
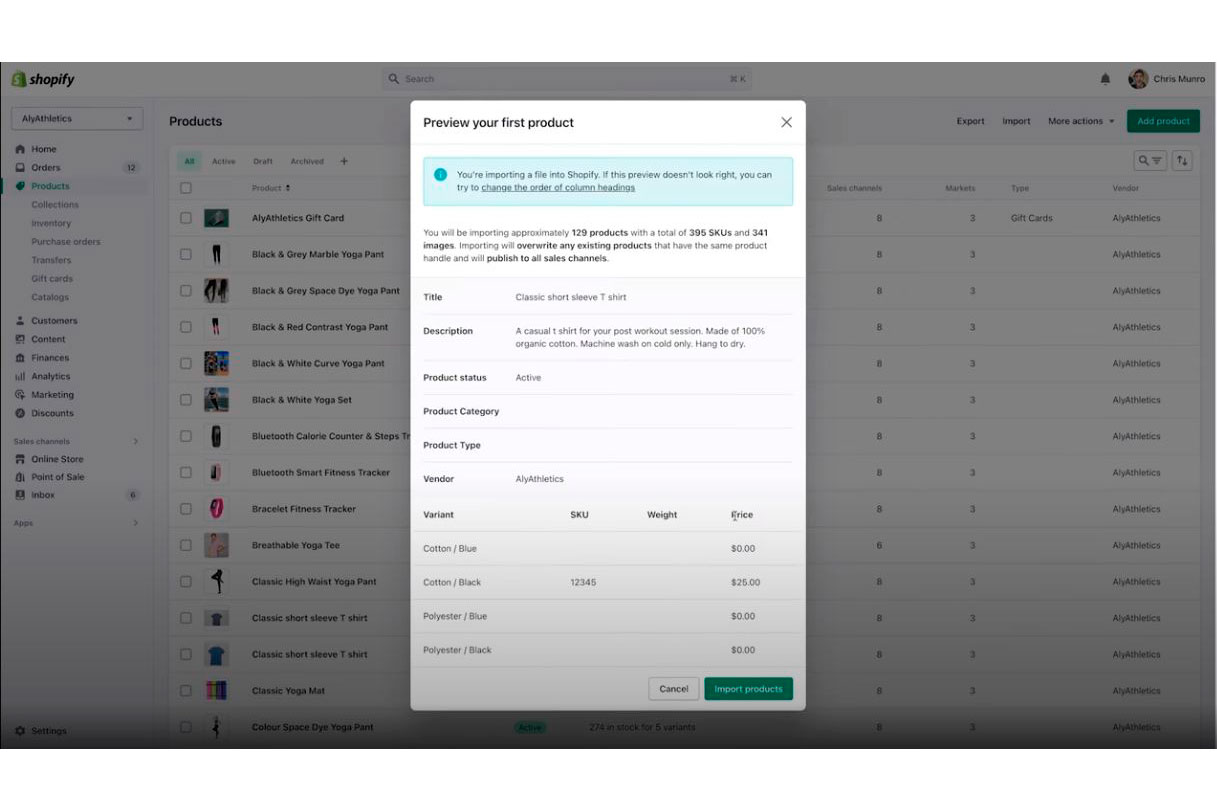
Source: How to Add Products using a CSV file || Shopify Help Center from: https://www.youtube.com/watch?v=y_x0L_Oj4Zk
After uploading your CSV file, Shopify will display a preview of your data. Take a moment to review this preview to ensure everything looks correct and make any necessary adjustments. Once you’re satisfied with the data, click ‘Start import’ to begin the process
It’s important to know that the time required for importing your products will depend on the number of products you have. For stores with a smaller inventory, the process can be relatively quick. This allows for a swift transition, enabling you to review and verify the imported products shortly after the import starts.
On the other hand, if you have thousands of products, the process may take several hours due to the larger volume of data. It’s best to plan large imports during off-peak hours to minimize disruptions and ensure thorough verification of all product details.
Step 5: Verify Imported Products
After the import is complete, it’s important to verify the imported products in your Shopify store. Check that all product details, such as titles, descriptions, and prices, are accurate. In addition, ensure that product images have been imported correctly and make any necessary adjustments to inventory levels to reflect your current stock.
This verification step is crucial to ensure that your product listings are complete and accurate in your new Shopify store.
Not so difficult after all, right?
However, you may encounter some problems and knowing how to face them is the key to success.
Troubleshooting Common Issues
Source: How to Add Products using a CSV file || Shopify Help Center from: https://www.youtube.com/watch?v=y_x0L_Oj4Zk
During the import process, you might encounter some common issues.
For instance, if your CSV file format doesn’t match Shopify’s requirements, you may receive errors. Double-check the format, ensuring that each product has a unique handle and that the CSV file is saved in UTF-8 format.
Another common issue could be that your CSV files are not mapped correctly to Shopify’s fields, review and adjust them during the preview step. In addition, duplicate products can also occur if handles or titles are not unique; make sure each product entry is distinct.
To avoid these and other problems and guarantee the success of importing products, there are also practical tips that you should know.
Best Practices for Product Importing
To ensure a smooth importing process, I recommend you to follow these best practices:
- Backup Your Data: Always backup your current product data before importing new products.
- Use Descriptive Titles: Use clear and descriptive titles for your products to improve SEO and customer experience.
- Regular Updates: Regularly update your CSV file to reflect changes in your inventory.
- Test Small Batches: Start with a small batch of products to test the importing process before uploading your entire inventory.
Final Words
Importing products into Shopify can be a game-changer for your business, dramatically simplifying your store management and keeping your inventory organized.
By following this guide, you’ll master the import process with ease, setting yourself up for a seamless, error-free transition. This means more time for you to focus on what truly matters – growing your business and delighting your customers.